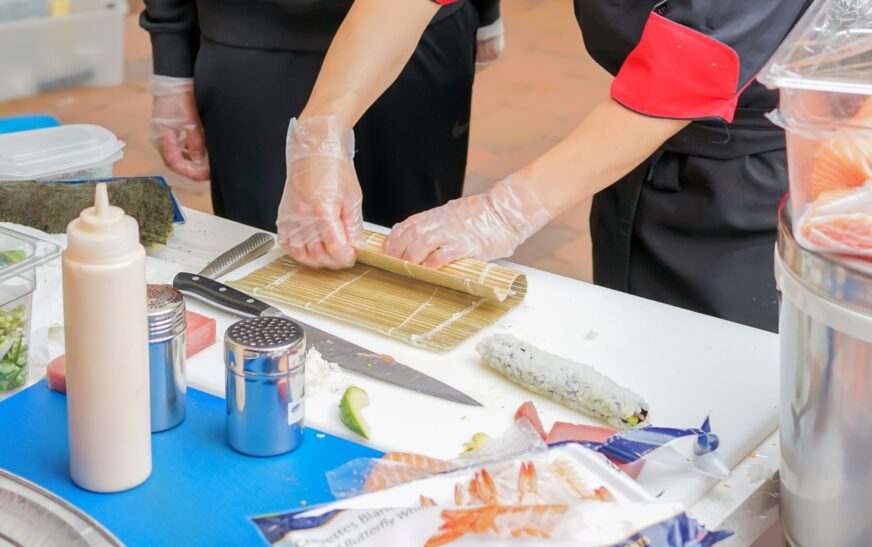
Sushi, with its delicate balance of flavors and artistic presentation, has captured the hearts and taste buds of people worldwide. It’s not just a meal; it’s an art form. While sushi bars and restaurants offer an exquisite experience, there’s something truly special about crafting your own sushi at home. With a little practice and the right guidance, you can embark on a culinary adventure, mastering the art of sushi-making.
The Essentials of Sushi Making
Before we dive into the step-by-step guide, let’s gather the essential tools and ingredients you’ll need:
Ingredients
- Sushi Rice: Choose high-quality short-grain Japanese rice.
- Nori Sheets: Thin, roasted seaweed sheets.
- Fresh Fish: Opt for sushi-grade fish like salmon, tuna, or yellowtail.
- Vegetables: Cucumber, avocado, and carrots for fillings.
- Soy Sauce: For dipping.
- Wasabi and Pickled Ginger: Classic sushi condiments.
- Bamboo Rolling Mat: To make perfect rolls.
- Sharp Knife: A sushi knife is ideal, but any sharp knife will do.
- Rice Vinegar: To season the rice.
- Sesame Seeds: For garnish.
Tools
- Sushi Rolling Mat: Also known as a makisu.
- Plastic Wrap: To cover the rolling mat.
- Bowl of Water: To wet your fingers and prevent rice from sticking.
- Cutting Board: For slicing sushi rolls.
- Sharp Knife: Ensure it’s wet to prevent sticking.
- Sushi Rice Paddle: Helps in spreading and mixing rice.
Step 1: Preparing Perfect Sushi Rice
The foundation of great sushi lies in perfectly cooked rice. Follow these steps:
- Rinse and Soak: Rinse the rice thoroughly until the water runs clear. Soak it for 30 minutes, then drain.
- Cook the Rice: Use a rice cooker for best results. For each cup of rice, add 1 1/4 cups of water. Once cooked, let it cool slightly.
- Season the Rice: In a small bowl, mix 3 tablespoons of rice vinegar, 2 tablespoons of sugar, and 1 teaspoon of salt. Gently fold this mixture into the cooked rice while it’s still warm.
Step 2: Slicing and Preparing Fillings
Now, let’s prepare the fillings for your sushi rolls:
- Slice the Fish: Use a sharp knife to slice the sushi-grade fish into thin strips. For safety, ensure your knife is wet.
- Prepare Vegetables: Slice cucumber, avocado, and carrots into thin, matchstick-like strips.
Step 3: Assembling Your Sushi
It’s time to get creative and assemble your sushi rolls:
- Lay Out Nori: Place a sheet of nori on your rolling mat, shiny side down.
- Spread Rice: Wet your fingers and spread a thin layer of sushi rice evenly over the nori, leaving about half an inch of nori at the top edge.
- Add Fillings: Arrange your choice of fish and vegetables in the center of the rice.
- Roll it Up: Carefully lift the bamboo mat’s edge, tucking it over the fillings. Roll it tightly, using the mat as a guide.
- Seal the Roll: Dab a bit of water on the exposed edge of nori to seal the roll.
- Slice and Serve: With a wet knife, slice the roll into bite-sized pieces. Ensure each slice is clean and well-defined.
Step 4: Presentation and Garnish
The visual appeal of sushi is part of its charm. Here’s how to make your sushi visually stunning:
- Garnish with Sesame Seeds: Sprinkle sesame seeds over your sushi rolls for a delightful crunch and visual contrast.
- Plating: Arrange your sushi on a clean, beautiful plate. Use pickled ginger and wasabi as colorful and flavorful accents.
Step 5: Dipping and Savoring
Sushi etiquette is an essential part of the experience.
- Soy Sauce: Pour a small amount of soy sauce into a dipping dish. Dip your sushi gently, fish-side down, to avoid soaking the rice.
- Wasabi and Pickled Ginger: Use these condiments sparingly. A small amount of wasabi can be added to the soy sauce for a kick of heat.
Conclusion
Congratulations! You’ve taken a journey into the art of sushi making, turning your kitchen into a sushi haven. Remember, practice makes perfect. The more you experiment with different fillings and techniques, the more you’ll master this exquisite culinary art.
So, invite friends and family, roll up your sleeves, and enjoy the fruits of your labor. Savor the burst of flavors, the textures, and the satisfaction of creating sushi that’s not just food but a masterpiece. With each roll you make, you’re one step closer to becoming a sushi-making maestro.


